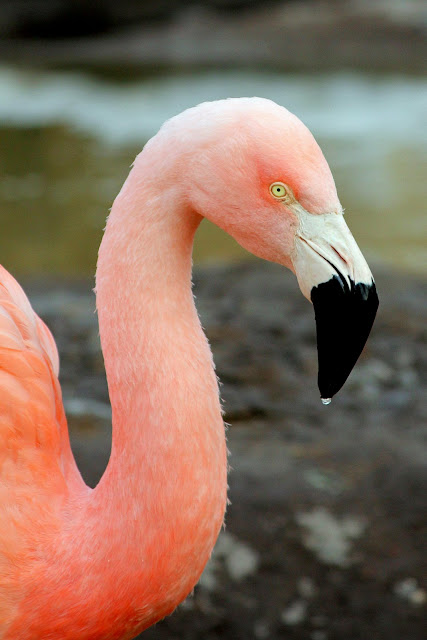
I tried switching to my camera's manual mode to get the above photo, sans fencing grid, even though I was shooting a few feet in front of the wire fencing. It took a few tries, and a tripod would have helped, but manual shooting mode (instead of auto focus /easy) did work for me.
It was strictly an experimental photo session, I learned as I went by trial and error. Not such a bad way to learn if one has the time and patience, and are willing to shoot a lot of shots.
Sometimes the fence even served to create a cool shadow and back ground effect like in this picture:
BUT....
A while ago I learned that DSLR cameras only have around 100,000 shots that they will take before the shutter will stop working and will need replacing (at around $200 for a Canon Rebel).
There is a way to find out how many times you have clicked your camera's shutter...which is probably a good thing to know before heading out for a vacation of life time or a once in a life time event.
After finding out this information I have stopped doing "spray and pray" photography and now while I still do trial-and-error sessions, I am trying to limit those by studying up a bit.
Two weeks after my fenced aviary visit my free subscription on-line photography school sent the following tips on shooting through a fence in their weekly email.
I thought the tips were so easy to understand and remember that I decided they were worth sharing:
- Switch to Manual Focusing – one challenge you may face shooting through any kind of fence is that your camera may not know what to focus on – the fence or the object behind it. Switch to manual focus mode and you’ll be in complete control of what is in and out of focus.
- Get close the the Fence – ideally your best bet is to try to make the fence so out of focus that it can be barely seen in your shot. To do this one strategy is to get up very close to the fence – so close your lens has no chance of focusing on it. It may not be possible to be right up against a fence (shooting a lion at the zoom may mean you have other barriers in place for your own safety) but the closer the better.
- Use a Large Aperture – choose a large aperture (making the number of your aperture as small as possible) will help to narrow the depth of focus and will hopefully through the lens even further out of focus.
- Wait Until your Subject is away from the fence – if your subject is moving around behind the fence – wait until they are a little further back from the fence to take the shot. The closer they are to the fence the more the fence will be in focus.
- Position Your Lens to Shoot Through Larger Gaps – This one isn’t rocket science – but if the fence has largish openings you’ll do better to position these gaps in the middle of your frame.
- Avoid Reflections – if shooting through a part of a fence where there are reflections from the sun or other lights coming off the fence you’ll find the fence will become even more noticeable. As a result try to find a part of the fence that is shaded – or get someone to stand in a way that casts a shadow on the fence.
- Incorporate the fence into your composition – it may be that the fence can become an important part of your composition – so consider breaking all the above rules to try that out!
There is a link to the school below...you really should consider subscribing to this free tutorial site! It has become a weekly highlight for me, as the email contains easy to understand tips on photography composition, camera techniques, post production work, camera gear and a weekly challenge to get your creative juices stirred up. Plus some really terrific pictures to look at too.
Read more by clicking HERE
- Added bonus: The reader's comments offer a few more terrific tips. Be sure to check them out!


